How to Make Privacy Fence Step by Step

Looking to improve your outside space with a privacy fence? This detailed step-by-step tutorial will teach you everything you need to know about how to make privacy fence that meets your demands.
Want to enjoy your backyard away from inquisitive eyes? Or maybe you just want some peace in your own space? A privacy fence may transform your backyard retreat, providing both isolation and style. However, before you grab your hammer and nails, you must first understand how to properly construct a privacy fence.
In this article, we’ll go over everything from picking the best materials to installation tips and methods. Whether you’re an experienced DIYer or a weekend warrior, you’ll discover everything you need to complete this job with confidence. So roll up your sleeves and let’s get started!
How to Make Privacy Fence on a Budget
Materials Needed
- Impact driver
- Exterior deck screws (1 1/2 inch)
- Olympic Maximum stain + sealant
- Post base
- 4×4 Cedar Posts
- Cedar boards for the fence (6 inches)
- Measuring tape
- Paint pan
- Paint brush
SEE MORE ARTICLES
How to Make Prison Wine: Guide to DIY Incarceration Brewing


How to Get Traded in MLB The Show 24
How to Choose a Good Forex Broker for Funded Trading
How to Write curriculum Vitae in Nigeria Kendy Expert Tips
First Step: Stain Boards
The stain you pick for an outdoor job is quite essential. Because the boards will be exposed to the outdoors, choose a waterproof stain that will withstand harsh temperatures. For this project, I’m recommending using Olympic Maximum’s all-in-one stain and sealant in the color Mystic Black. I prefer this brand since it has a great warranty, is fungus-resistant, and can be applied at low temperatures (35 degrees). It is easier to stain the boards before installing them; pour the stain into a paint pan and apply it to the boards using a paint brush. I applied two coats.
Second Step: Install Baseboards
For the post’s foundation, we cut a 10 × 10-inch piece of cedar wood and attached it to the deck structure underneath. Then, we screwed a 4×4 post base on top of that piece, added the post to the bracing, and put it in place, ensuring sure it was level along the way.
Third step: Installing the boards.
When assembling the boards, begin at the bottom. We used a level to ensure that everything was tidy and straight. This is critical at the start of the project to prevent issues later on. We attached the rest of the boards, leaving a ½ inch gap between them.
Fourth Step: Finishing touchesFence
To finish this space, I put vertical boards to hide all of the screws. I also planted plants along the fence and solar-powered lighting. I now have a more private spot to enjoy with friends and family!
10 Inexpensive Privacy Fence Ideas 2025

-
Natural Reed Fencing
Natural reed fencing is an excellent alternative to bamboo fencing. If you want your fence to complement your backyard’s design rather than detract from it, surround it with a variety of evergreen trees and plants. Hardy plants like monkey grass are ideal for a low-maintenance border.
-
Wood Privacy Walls.
When you think of fencing, you may envision a standard wood fence or a white picket fence, but you might choose darker, moodier colors for your outdoor space. If you have a privacy wall or fence, paint it black and arrange neutral furnishings for a more professional appearance.
-
Painted Food Fencing
Painting is a low-cost, easy way to express your personality. The interesting painted pattern on this fence adds a bright, cheery appeal to this garden, while the mirror makes it appear and feel larger.
-
Ivy-covered trellis.
A fence is essential if you have a tiny backyard and close neighbors. If a traditional wooden fence is not within your budget, consider installing a chain link fence or trellis and planting fast-growing climbing vines such as ivy.
-
Rustic Wooden Fence
Sometimes all you need is a simple addition to have a significant design impact. This wooden fence gets a pop of color with a simple hoop wreath filled with beautiful dried flowers.
-
Stone Wall
A chain link fence on its own is not a viable privacy fence option, but when plants are added, the appearance and function change dramatically. This outdoor dining space has the feel of a private restaurant, with a vertical garden fence on one side and a stone wall on the other.
-
Row of Shrubs
Everything in this backyard feels cozy and private. From the comfortable chairs to the various lighting options. The outdoor space is surrounded by thick trees and plants, providing additional solitude.
-
Weathered Wooden Fence
Thrift stores are an excellent resource for finding unusual artwork on a budget. Hang unique artwork and string lights to easily enhance your fence. Adding modest additions like these improves your backyard while making it easy to change the design with the seasons.
-
Painted Bamboo Fencing
Bamboo is a low-cost option that takes some upkeep, but it is a long-lasting, environmentally friendly fence material. You can paint or treat it to reflect your unique taste, as shown here with white cottage-style fencing.
-
Painted Wooden Fence Mural
When painting a fence, why limit yourself to a single solid color? A fence is a large canvas on which you may express yourself and make your property unique. This fence mural is vibrant and lively, setting the tone for the rest of the house.
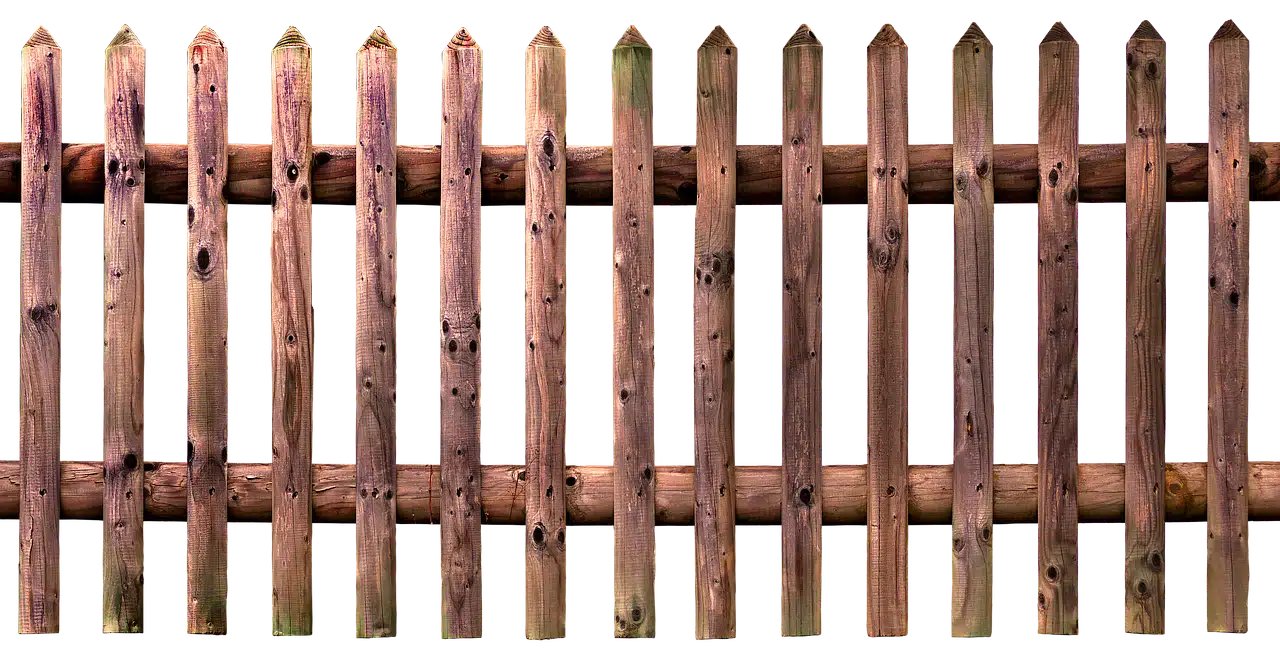
How to Build a Wooden Fence Step-by Step
Wooden fences are beautiful, especially if you want a natural look, and wood is a simple material to deal with, even if you aren’t a professional carpenter. Let us learn how to make a wooden fence!
Step one: Make sure you’re allowed and it’s safe.
You don’t want to go through the difficulty and expense of installing a fence just to realize that you need to take it down. Before you do anything else, make sure to verify local planning rules and see if you need specific authorization.
Determine the height of your fence at its highest point and ensure that it complies with the limitations in your area. If it isn’t, request planning approval before you begin and wait for it to be granted; otherwise, all of your hard work will be for naught.
Fill out the permit paperwork honestly and carefully, then contact local service providers to mark gas, water, and electrical lines for you. You don’t want to hit a power cable while installing your fence; therefore, this is an extremely important step.
You might expect service lines to be below the level you’ll need to dig to, but this isn’t always the case, so always check first. Once you’ve marked these lines, you should be ready to begin your project. Always allow service lines plenty of clearance to avoid accidents.
Step Two: Material Choices
What are you going to build your fence out of? Don’t just use leftover wood from past projects. It will appear sloppy, but it will also not last very long because the wood is unlikely to have been treated.
Spend some time researching the best type of wood for the conditions you’ll be building a fence in. If you live in a rainy or hot climate, this is especially crucial. It might treble the life of your fence.
A cheap fence is a waste of money because it will need to be repaired or replaced in as little as five years.
Talk to local wood merchants and see what they recommend. Treated woods typically endure longer than untreated choices. Remember that building a fence requires posts, support beams, and picket pieces. You’ll also need a weatherproof coating, screws, and nails.
You should also consider the height of the fence and the look you want to accomplish. Are you going with fancy or plain? Closed or open slats? Low or high? All of these factors will influence the materials you buy.
When purchasing stakes, keep in mind that at least one-third of them will be buried. Do not buy stakes that are simply the height you want your fence to be; you need ones that are at least a third larger, if not more.
Step Three: Mark It Out.
If the fence is to be built along your property’s boundary, make sure you know where it is and mark it. It may be helpful to consult with a land registry surveyor. You do not want to end up building on your neighbor’s plot.
Mark the area and discuss your ideas with neighbors to minimize future problems. If there is a debate over the fence, try to find a middle ground that will satisfy everyone.
You should then start marking the stakes. Remember that the height of the fence determines how deep you must stake it and whether you require planning approval.
Step Four: Stake the corners.
Next, drive stakes into each corner of the plot. You should next tie a thread around each stake and use a square to confirm that they are level and create 90-degree angles with one another. You don’t want your fence to seem weird; therefore, this is critical. Square edges are also more convenient to work with.
Check and double-check this measurement because it will be much more difficult to repair errors later, and it is nearly impossible to see by eye. If your angles are off, spend time adjusting the stakes until they are right. Don’t rush this stage of the project; taking the time to do it correctly will save you a lot of time and hassle later.
Step Five: Calculate the other posts.
After you’ve positioned your corner posts, you can begin adding the remaining posts. To do so, divide the total number of feet in one length by eight.
If it does not divide equally, add an extra post to keep the sides from being too far apart. For example, if you divide 40 feet by 8, you will need five posts.
If you divide 42 feet by 8, you’ll need six to compensate for the extra two feet. Do not place your stakes more than 8 feet apart.
Once you’ve determined how many posts you’ll need for one route, you can calculate how far apart your stakes should be. Try to ensure that all of the spacing on a single side is even; this will make your fence seem better and prevent weak places from developing over time.
Calculate and stake each side separately, as a shorter length may require fewer posts or a different spacing to provide enough support. It doesn’t matter if your posts are eight feet apart on one side but just seven on the other.
Step Six: Dig and prepare the holes.
You now need to dig the holes where you staked. You can drill holes with a post-hole digger or by simply moving the stakes and using a spade. A post-hole digger is much easier to use, so unless you’re building a little fence, it’s worth getting or renting one.
Calculating the depth can be difficult, but you should bury at least a third of the post in the earth. Tall fences require deeper holes to be dug, whereas low fences require less depth.
Consider the type of soil you have and the type of weather you regularly experience. If you reside in an area prone to strong winds, you should install your fence posts deeper into the ground to increase longevity and stability. Sandy soil may also require greater depth than clay soil.
After you’ve excavated your holes, add about four inches of gravel to the bottom. This will give stability as well as drainage, directing water away from the bottom of the post. Dry posts last longer. The gravel should also reduce the possibility of the post sinking if rain erodes the soil.
Step Seven: Cement In The Posts
Consider the type of soil you have and the type of weather you regularly experience. If you reside in an area prone to strong winds, you should install your fence posts deeper into the ground to increase longevity and stability. Sandy soil may also require greater depth than clay soil.
After you’ve excavated your holes, add about four inches of gravel to the bottom. This will give stability as well as drainage, directing water away from the bottom of the post. Dry posts last longer. The gravel should also reduce the possibility of the post sinking if rain erodes the soil.
Once the concrete has hardened, cover the rest of the hole with earth to conceal it.
Step Eight: Add Support Boards.
When all of your posts are in place, it’s time to add the support boards. First, tie a thread around the top of each stake, extending from one end of the fence to the other. This will reveal a level point and allow you to keep the fence at the same height around its perimeter.
Once your line is in place, add the horizontal struts (support boards) to which you will subsequently fasten the pickets. These should be spaced at roughly 24 inches apart or less, not further, or they may flex. Depending on the height of your fence, you will likely need 3-4 support boards.
Check that each support board is level with a spirit level before screwing it in place with decking screws. They should provide strength and stability. Pause now and then to ensure that your boards are aligned on each section of the fence; a mistake is easier to repair halfway through than at the finish.
Work slowly and carefully, and, as with the stakes, space them fewer than 24 inches apart rather than more if necessary.
Step Nine: Secure The Pickets
Finally, you’re ready to start adding pickets to the fence! You can screw or nail boards into position, but first consider how they will look, whether you want any gaps or overlaps, and so on.
You may purchase pre-cut fencing planks, which should work well for this project, and there are numerous possibilities, both simple and ornate.
Consider the appearance you want to achieve and search for fences online to help you make a decision before you buy. You might also draw your plan to check how it appears on paper.
Finally, you’re ready to start adding pickets to the fence! You can screw or nail boards into position, but first consider how they will look, whether you want any gaps or overlaps, and so on.
You may purchase pre-cut fencing planks, which should work well for this project, and there are numerous possibilities, both simple and ornate.
Consider the appearance you want to achieve and search for fences online to help you decide before you buy. You might also draw your plan to check how it appears on paper.
If you’re nailing your boards, make sure to use weatherproof galvanized nails that won’t rust away – else, you’ll have to replace your fence soon. Screws should also be corrosion-resistant and suited for outdoor use.
Step Ten: Treat and Paint.
When the job is completed, it is time to treat the wood. This will significantly extend its lifespan and should be done even if you have purchased treated wood. It also provides an opportunity to change the appearance of your fence if desired.
You can just apply a weatherproofing coat that will not detract from its aesthetic value, or you can paint or stain the fence. All of these will increase longevity, especially if you repeat the coating frequently.
Oil-based paints are frequently the best choice for outdoor applications. These will provide long-term protection and ensure that the fence lasts regardless of the weather.
Conclusion
Building a privacy fence may be a fulfilling endeavor that increases the value, security, and beauty of your property. By following this How to Build a Privacy Fence: Step-by-Step Guide, you can ensure that your new fence suits your demands and will last for a long time.
So, whether you want to create a cozy outdoor refuge or simply set some limits, a well-built privacy fence is an excellent addition to any property. Now that you have the necessary materials and expertise, you can begin your fencing project!